Friday, May 3, 2013

DIY Door Vinyl

Well Hello There!  Good Morning Everyone! 
 
It is Friday morning, the sun is shining, and though it is a bit cold outside for May, I am already having a great morning so I wanted to say Hello to everyone before I begin my day.
 
When people come to my front door I want it to be welcoming, and I want it to be cute of course.  I saw the cutest picture of a red door with vinyl on the front of it and thought "I don't want to pay for that when I can do it myself".  I have a Cricut machine and I have some vinyl already so why not make it myself?  I never even thought of using vinyl word art on the front door, but what a super cute idea!  I don't have a red door and I sure don't want to paint it, but I thought that white vinyl on my brown door would be okay and so that is what I did. 
 
Every time I am in the front yard and I see my front door it makes me smile and I hope that each person that comes to my front door does too.  Yet again, another simple DIY project for my home that makes such a big impact by inviting people to come to my door.
 
It doesn't matter if your door is painted or what it is made of.  Wood, metal, glass...any material will work for this project.  That is the beauty of vinyl!  This is such an easy project that I want to share how I did this so that anyone else with the right tools can do this too! 
DIY Door Vinyl
You will need:
  • vinyl in whatever color you choose
  • Cricut (or other similar machine)
Since I am using a Cricut to cut my vinyl I use the Cricut Craft Room software.  It is a free software that connects directly to your machine so that you can design your image on the computer and see what they look like and how they fit onto your paper before printing.  This is great for using different size letters and for saving paper by adjusting how your letters fit onto the paper before you start cutting.
 
You can also use the software to 'weld' your letters together to make them connect as one word rather than having each letter cut separately and then trying to put them together later.  Yikes!
 
I would have liked to have a different font, but this is the only cursive font that I have already and so I used it for this project.  I measured the surface of my door that I wanted to put this word on and then created my image.  This is what it looked like on my screen before I printed.  I created the word and then lined it up the best I could on the page so that I don't waste too much of the vinyl.  Hey, this stuff isn't cheap!
I then cut the correct size vinyl to fit my entire word without a lot of leftovers and placed it on the mat where I need it to print the image.
 You might have noticed that some of my letters have weird overlapping tails on them when I showed you my computer screen image.  Well, you are right...there is nothing that I can do about that on the screen because that is the way the font is designed.  But there is something that I can do about it now that I have my word cut out. 
 
When I was creating my image, I made sure to place my letters so that once I printed it out, I would be able to cut off the extra tails of the letters that I didn't want and still make it look like a 'normal' cursive written word. 
 
I peeled off the vinyl outside of the word so that I could see the word itself better on the background and then cut the extra tails off.  This is what it ended up looking like after I took my scissors to it.  Much easier to do than it sounds I assure you!
For the final step...putting it on the door.  This part too is much easier than it seems, especially if you choose a short word like "Hello".  Before I did this, I made sure to clean the door really well AND made sure that is was dried completely so that I would have no issues with my vinyl sticking. 
 
I then started placing it on there and lining up one letter at a time, but not pressing down hard until I make sure that the entire word was where I wanted it.  I did have to unpeel it a few times to get it lined up correctly and make sure that no bubbles were present, but again, it was much easier than it sounds and since I didn't press hard, it didn't affect the stickiness of my vinyl AT ALL.
  
Once I had it placed exactly where I wanted it I went back and rubbed on it to make sure it was stuck on there good and with no wrinkles in the vinyl.

This was such a fun project and turned out to be much easier than I had imagined and that always makes me feel happy and accomplished!

Make sure you tell someone "Hello" today, just in case they don't come to your front door! 
 
Here is a picture of the one that was for sale on Etsy.  I love the red door here, but wasn't willing to paint mine.  And I like the period at the end.  Hehe  You could pick another word too, such as welcome...or even in another language!

Tuesday, April 23, 2013

Corn Casserole

I have always loved a good casserole, but this is not just any casserole.  This is one of, if not THE best casserole that I have ever had! 
 
Jiffy cornbread mix...do I have to say anything else?  I think not!  That speaks for itself.  Yum.
 
Every time we have a family or holiday get together I am asked to make this.  Not only does it taste great right out of the oven, but it is also good as a leftover for several days and is super easy to make.  It can't get any better than that.  You can even make it the night before and keep it refrigerated until you are ready to serve.  Just make sure that you reheat it in the microwave or oven for that warm cornbread taste.  This is a great dish to take to a work party or any other potluck event as well. 
Corn Casserole
Servings:  12   WW Pts+:  6 
You will need:
  • 1 can creamed corn
  • 1 can kernel corn, drained
  • 1 cup light sour cream
  • 1 stick of light butter
  • 1 box Jiffy cornbread mix
  • 2 eggs
Mix together all ingredients until well blended.
 Pour into a lightly greased casserole dish*.
 
*Any shape or size will do as long as it is about 2 quarts, but the deeper the dish, the longer it will take to cook and might be hard to get done in the middle depending on your oven. I like to use a longer, flat dish rather than a deep one.
Bake for 30-45 minutes at 350°F.
That is it!  So easy and simple and yet ALWAYS a favorite!

Click here for a printable version.

Tuesday, April 9, 2013

Spring Bucket List {Printable}

Spring is here and I am already planning some great fun things to do with my family this year.  Last year Miss Priss was too little to be able to enjoy some great family fun, but this year I think she is ready!

My hubby and I love to be outside and it appears that Miss Priss does too and so this spring and this summer both are going to be a lot of fun...as long as it doesn't get too hot to be outside!  Oh, and we also got a swimming pool put in this year and so I plan on having some great times in the backyard this year.  I am super excited to get to go swimming in my own backyard this summer.
 
I made a Spring Bucket List to start out the sunny season with some things that we can all do as a family, even having a little one around.  I think that Miss Priss is going to have so much fun with her mommy and daddy this year...I just can't wait to get started and get the first thing checked off my list!
 
 
The link above will take you to a printable PDF version of my Spring Bucket List. 

I used the Sahlin Studio Rejuvenate and Treasured Moments and Shabby Princess Promise free scrapbooking kit downloads to design my bucket list.  You can download them for free personal use here:


Thursday, April 4, 2013

Jellybean Almond Bark {Easter Treat}

Does anyone have some left over jellybeans from Easter that you are still trying to figure out what to do with? 
 
Sure, you can jut eat them all by yourself as you sit at your desk all week at work, or while you are planted in front of the TV while riding out the spring rainy weather, OR you could make something fantastic and take it to work with you and share with others.  You could still keep it to your self if you would like, but I like sharing, especially when it comes to candy!  Otherwise I eat it all and then really regret it later.
 
Of course, you could also it for Easter itself, but it is a little late for this year so remember this for next year.  I know I sure will!

AND...You could also use M&M's or sprinkles if you don't like jellybeans.
Jellybean Almond Bark
You will need:
  • almond bark
  • jellybeans
Put as many cubes of almond bark as you want into a microwaveable bowl and place in the microwave for about 2 minutes or until the bark melts into a smooth liquid that is easy to pour, stopping every 30 seconds to stir.
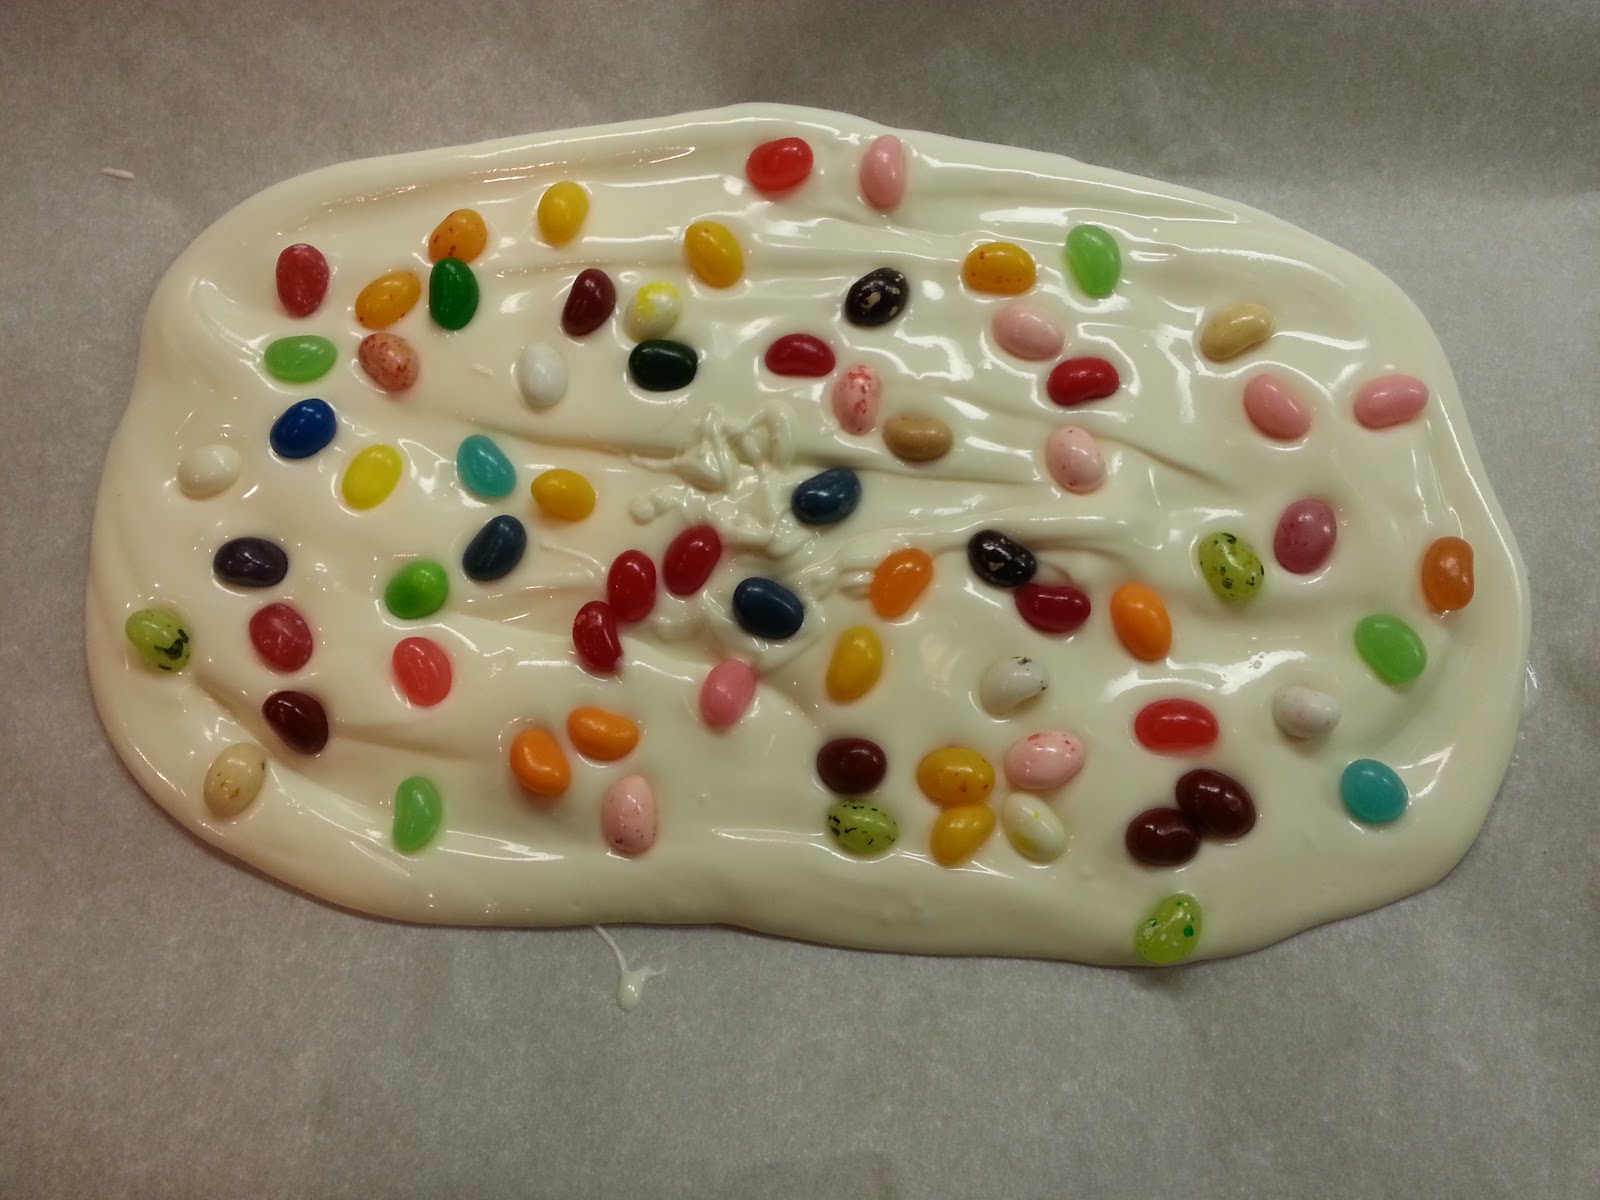
Pour the almond bark liquid onto a sheet of parchment paper immediately before it cools.  I sat my parchment paper on a cookie sheet to make sure that I didn't make a mess, but you really don't need to do this if you don't want to.
Drop jellybeans onto your almond bark.  Use as many or as little as you like.  I did not do this myself, but would suggest that you go back and press the jellybeans into the almond bark a little bit so that when you start to break it into smaller pieces they jellybeans hopefully do  not fall out like mine did.
 Let it sit overnight or for several hours until cooled completely.  It will look the same afterwards as it did before it was cooled.
 You can then break it into bite sized pieces for all to enjoy!  Yum, doesn't that look good?  You could also add M&M's, Easter colored sprinkles or even some candy melts in various colors to make it even more tasty. 
Well, I made some bark and although I did keep some for myself, I placed some in the break room with this cute little note and by the time I looked again it was all gone!  I am sure glad that I got a bite of it before I put it in there...I had no idea that it would go this fast!
One of the best parts is that you can make as little or as much as you want and can add as many jellybeans and other treats as you want too!


Saturday, March 30, 2013

Carrot Patch {Easter Treat}

It is time for Easter already and a simple Easter treat is always welcome at my house.  Here is one that I made for Miss Priss' class on Friday.  Like the other Easter treat that I made for her class, this one is easy to make, I already had most of the ingredients at home to make it and it is one of my favorites too!

I like too that I can have a good chocolaty treat and still feel okay about eating it when i use skim milk, light Cool Whip and reduced fat Oreos.  I know you are laughing, but seriously...it makes me feel better and that is all that matters right?
Carrot Patch Easter Treat
Servings: 10-12
You will need:
  • 2 cups Oreos (about 20)
  • small amount of orange icing or white icing and orange coloring
  • decorating bag with round tip
  • 8 oz Cool Whip
  • 2 boxes chocolate pudding mix
  • 2 cups milk
  • individual containers or plastic cups
  • edible green grass or green fondant
Put the Oreos in a Ziploc baggie and roll with a rolling pin to crush.  Do not try to hammer them or bang on them or you will create holes in the bag which will then leave crumbles all over your counter top and not only does this leave a huge mess, but then you have less cookies to eat!  :)
 
Mix the pudding and milk together with beaters just like you would if you were making pudding.  I did mine in two separate bowls because I made part of the batch with Almond Milk so that Miss Priss could have some since she has a sensitive tummy and we try to stay away from milk and cheese.
Fold in the Cool Whip until well blended and then sprinkle about 2/3 of the crushed Oreos into the mixture and stir again until well blended.  There is the dirt for your carrot patch!  (Or any other veggies that you might want to plant in your dessert)
 
Pour into individual cups or containers and top with the remaining Oreo crumbles.  Since I did this for a group of one-year-old babies I only filled them about 1/3 of the way full and so I got 12 cups from this batch.
Looks yummy already and we still have some more sweets to add to it!  This is the point at which we will then add our carrots to the patch.  If you wanted to make a simple summer treat such as a Father's Day themed or boys birthday party you would add gummy worms to make 'Worm Dirt'.  This is the recipe that we see most often, but isn't really Easter themed.
This would be a great way to use up some left over icing if you have any from a previous project, but I did not and so I mixed some orange frosting for the carrot tops and put it into a decorating bag with a circle tip.  Any size circle will be okay depending on the size of your carrot, but you don't have to buy a new one just for this one project.
Pipe in a circle in the center of each treat container in order to create what looks like the top of a carrot.  If you make it and it doesn't look big enough or you have a lot of icing left over you can always go back and make it bigger.
 I was unable to find edible grass, which would be the easiest way to create the leafy part of the carrot and so I rolled out some green fondant and cut into small strips.  I cut three for each container and let them sit overnight.  I bought the already colored fondant and it doesn't seem to bleed onto the rest of your treat even after a few days, but I have had fondant do that before when I colored it myself so be aware of that possibility.  If possible, it would be best to put the fondant on right before serving or transporting your Easter treat.
 
Carrot Patch treats are ready to eat and oh so yummy!  Even though you are eating treats that are themed for the modern aspects of the holiday, don't forget what Easter is all about!  Have a blessed holiday!


Friday, March 29, 2013

Goldfish Carrot {Easter Treat}

We all have those times that we need to make something cute fast for a school party, a family get together or a church event.  Well, that was me on Wednesday this week when I received a phone call from my hubby while on a work trip in North Dakota (not especially close to my home in Oklahoma) asking me what we should sign up for to bring to the Easter party on Friday.  And I wasn't even coming home until Thursday night...yikes! 
 
This was also Miss Priss' first Easter party and so I wanted to make sure that we did our part to make it special...even it if was me and dad that were going to be the ones to remember this special day!
 
I wanted it to be something special for Easter and something that wasn't all sugar.  I figured that someone would be bringing cupcakes and other sweets and I wanted to do something just a little different.  These are one-year-olds too, by the way.
 
I did my usual searching on the internet and decided on two things that are easy to make and don't take a lot of time either.  I had already helped my mom plan for something similar for her church and so I thought I could handle this fairly quickly...and there are only ten kids in the class and so that made this even easier to pick something cute and creative without running out of time.
 
If you are still trying to think of something quick for Easter Sunday, here are two great, quick and easy ideas for you.  Most of what you will need can be found in your pantry or home already and the rest can be easily improvised from other items or picked up at a local store.
 
Goldfish Carrot Easter Treat
You will need:
  • Goldfish crackers
  • icing decorating bags
  • ribbon & scissors
  • green tissue paper 
Start by filling your pastry bags a little more than half way with Goldfish crackers.  You may need to strategically place the first one in there and make sure that you get it down into the bottom of the bag before filling the bag the rest of the way up.
When you have determined how many bags you are going to fill you can then cut the 'stem' of your bags, which I did from tissue paper.  You can skip this step and use a green ribbon on the steps below or green pipe cleaners, but I only had white ribbon on hand and I had a few recycled sheets of green tissue paper so this was the easiest option for me.  I was originally going to just use the ribbon and then came up with this afterwards.
 
Cut the tissue into a few small squares that fit into the size decorating bags that you are using.  I cut the first one as a long piece and folded it in half to give it a fuller look and then I used that one as a template to cut the rest of my tissue the same size.  You can see too that I used different colors of green...not that I particularly wanted to do that, but I ran out of dark green tissue paper and the light green was my next best color. :)
 I then bunched up the top of the bag and placed the green tissue paper in the top.  I had my husband hold it for me so that I could get my ribbon tied on tightly.
And that is it!  I arranged them into the Easter basket Miss Priss was taking to school which made a cute little party decoration too by the way!  Since there were several snacks there and these are such young kids, I just put one in each of the kiddos cubbys to take home with them.  That was more perfect that I thought it was going to be!
 
I am glad that I was able to come up with this idea so quickly.  I had planned to create some little tags to go with them, but got busy and ran out of time, so this will have to do for this year.
 
You still have a few days to go out and get some supplies if you want to make this quick and easy Easter treat!  Enjoy!


Wednesday, March 20, 2013

Easter Egg Hunt {Printable}

Spring is here!  Spring is here!  Today is the first day of spring! 
 
I am soooo ready for some warmer weather and am also soooo glad that it is not dark when I get home now.  I like to be able to do some things outside when I get home and the weather here in Oklahoma has been so great this week!  I am looking forward to some more great weather and working outside in the garden in preparation for this summer.
 
The start of spring and being able to spend time outside reminds me that it is almost time for Easter and I know that there will be a lot of Easter Egg Hunts going on over the next two weekends.  I just love holidays and this year my mother asked me to help her with some ideas and printables for her Easter celebration at church and while we were brainstorming and searching the internet for ideas I decided to make a simple, but cute Easter Egg Hunt printable.  The colors that represent are so pretty and it is one of my favorite holidays. 
 
I didn't have time to make anything extravagant, but with the help of Photoshop I was able to come up with a few different colors and designs for my Easter Egg Hunt printable.  All of the images below are designed for printing on a regular 8" x 10" sheet of paper and can be downloaded using the link below each image.  Whether you like pink, blue, green or purple there is a printable in all colors.  These printables would also be cute in a simple white frame and used for a decoration as well!


Feel free to use any of these printables for your Easter celebrations and decor!